I’ve wanted to build my own blog since university, a place to jot down random thoughts. However, I kept starting and abandoning projects, endlessly rebuilding it. I haven’t added much content, but I’ve become quite proficient at building websites using various frameworks! Undergrad is over, I’ve worked for six months, and I’m about to start a new postgraduate program. Hopefully, this is the final rebuild.
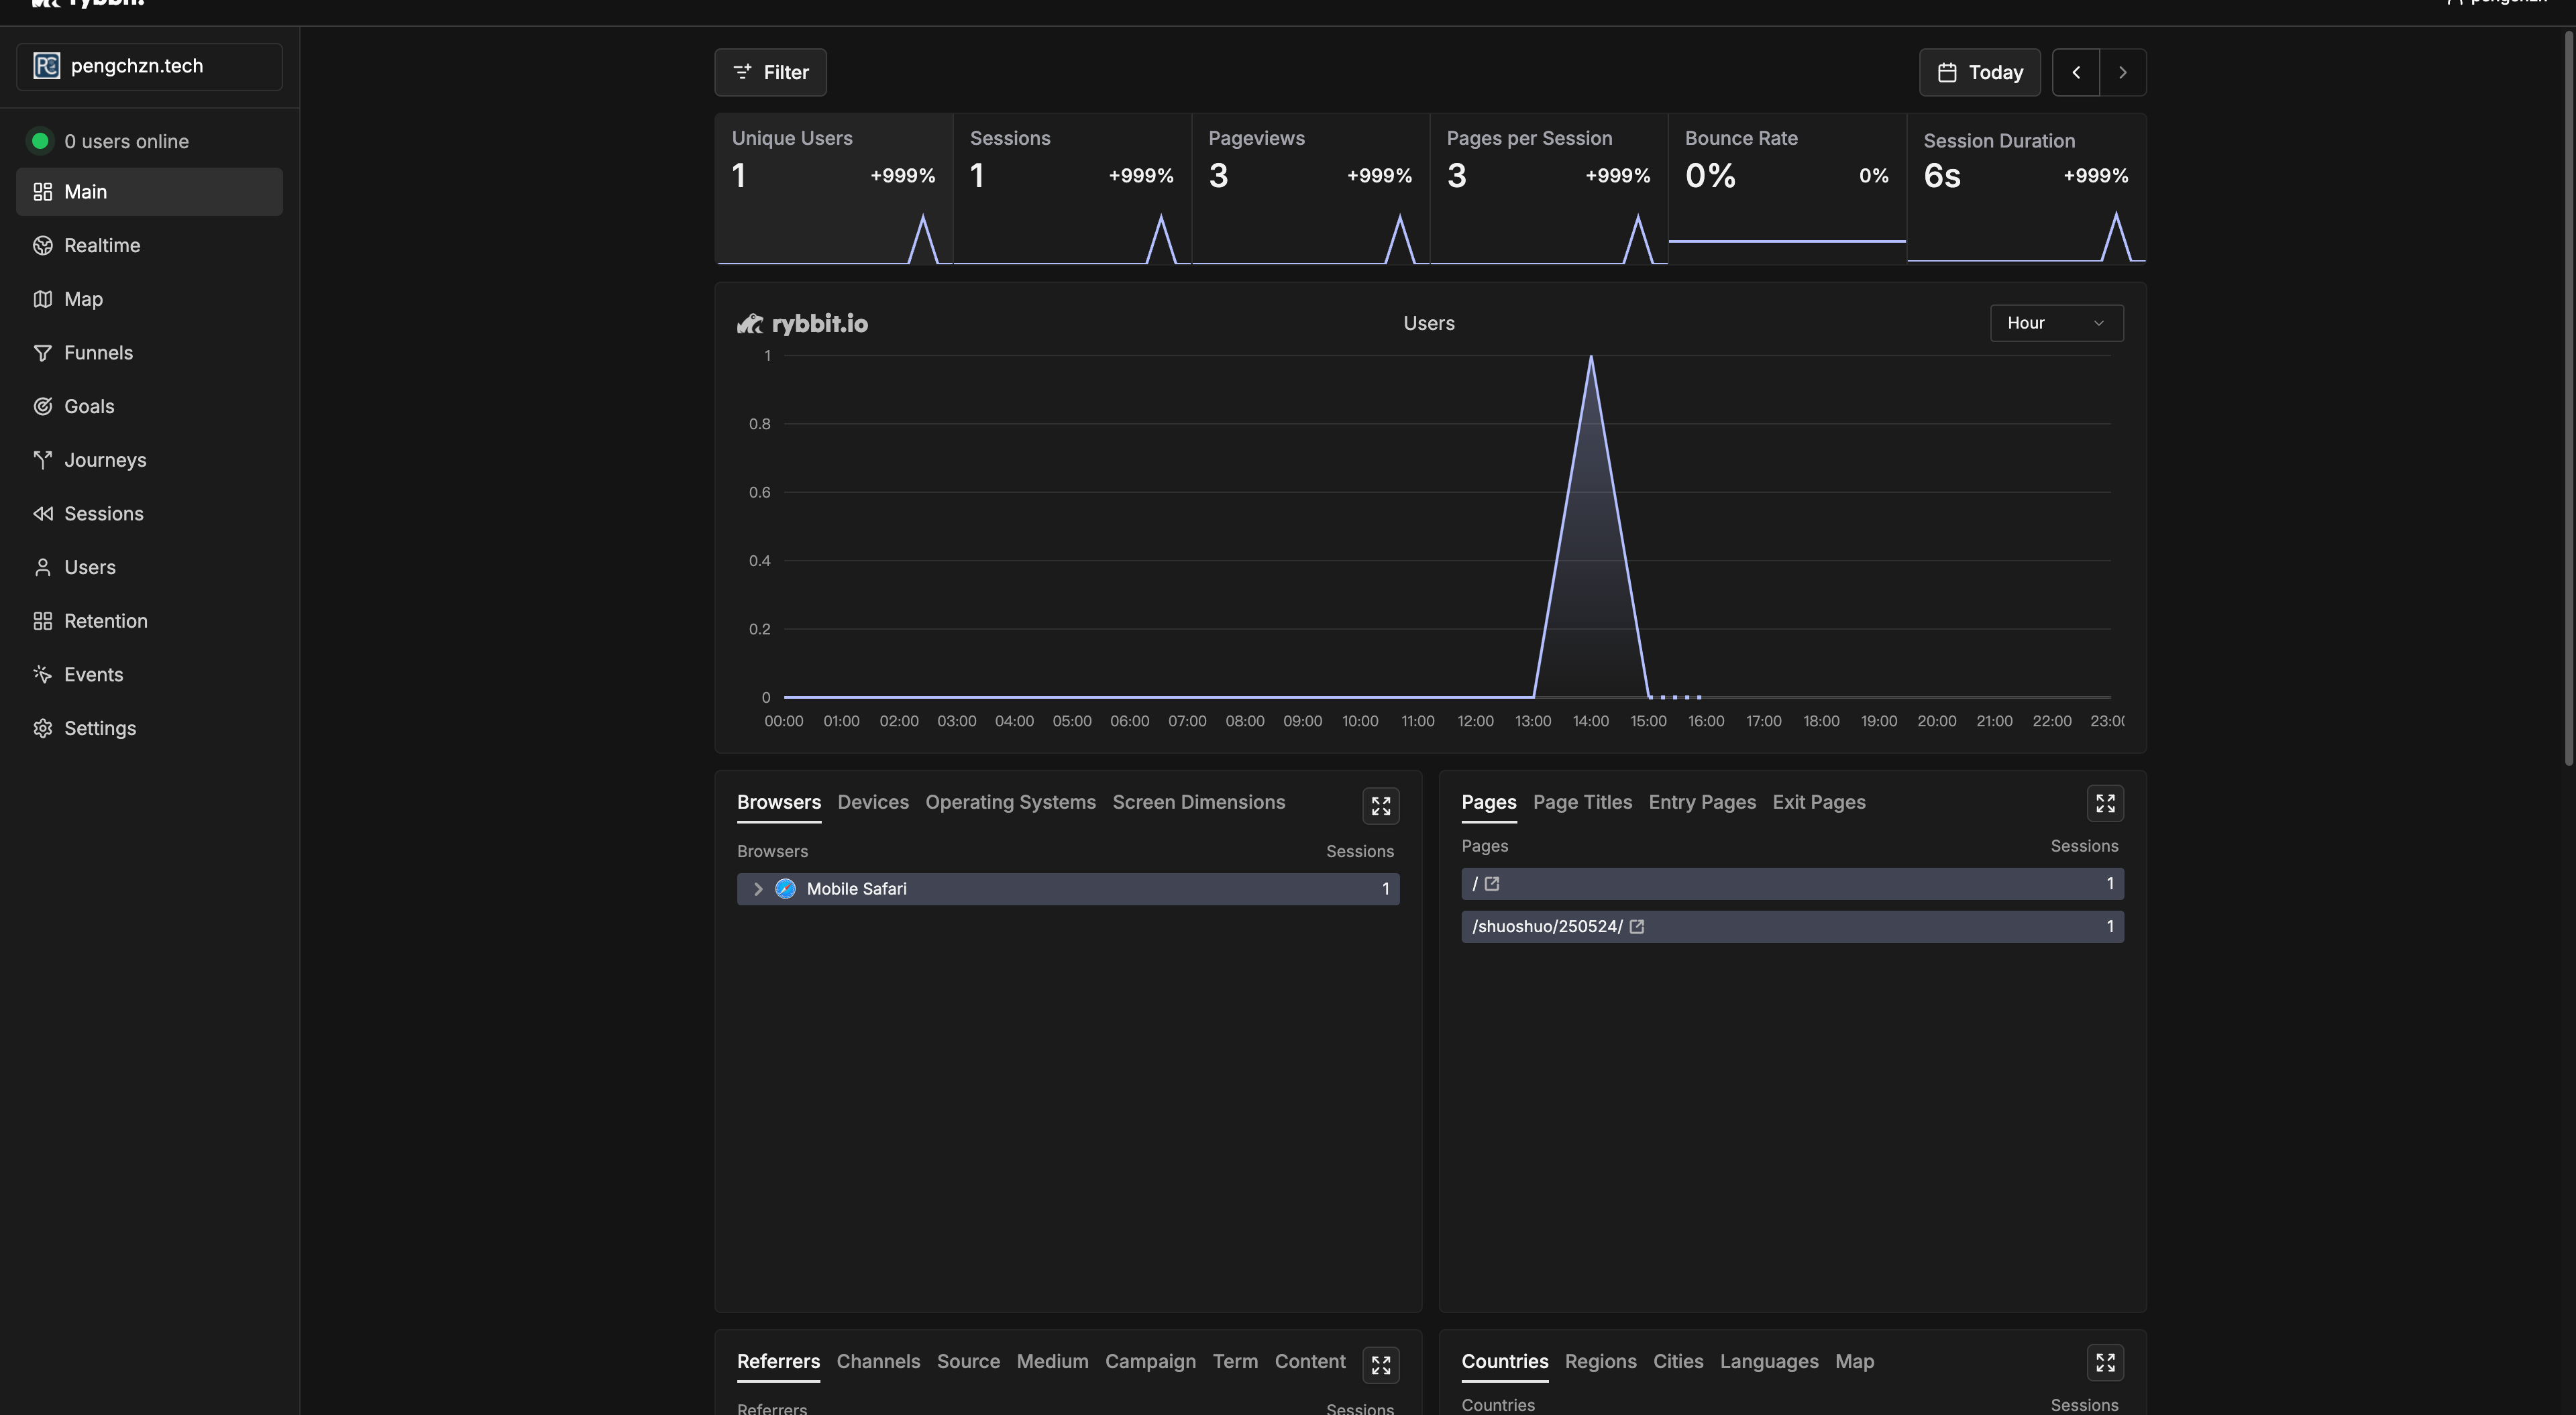
Initially, I used Google Analytics to track website visits (just in case it got popular!), but then I stumbled upon Rybbit, a cool, highly customizable open-source website analytics tool. Here’s how I deployed it.
Following the project’s self-hosting documentation, the requirements for deploying Rybbit are as follows:
| Server | A server with at least 2GB of RAM |
| Domain | A domain or subdomain (tracking.yourdomain.com) pointing to your VPS IP address, requiring HTTPS. |
| Git | Required to clone the Github repository |
I’m using a 4-core, 24GB ARM server from Oracle. It’s more than enough, perfect for a budget-conscious student like me who loves tinkering!
1. Installation
1.1 Domain Configuration
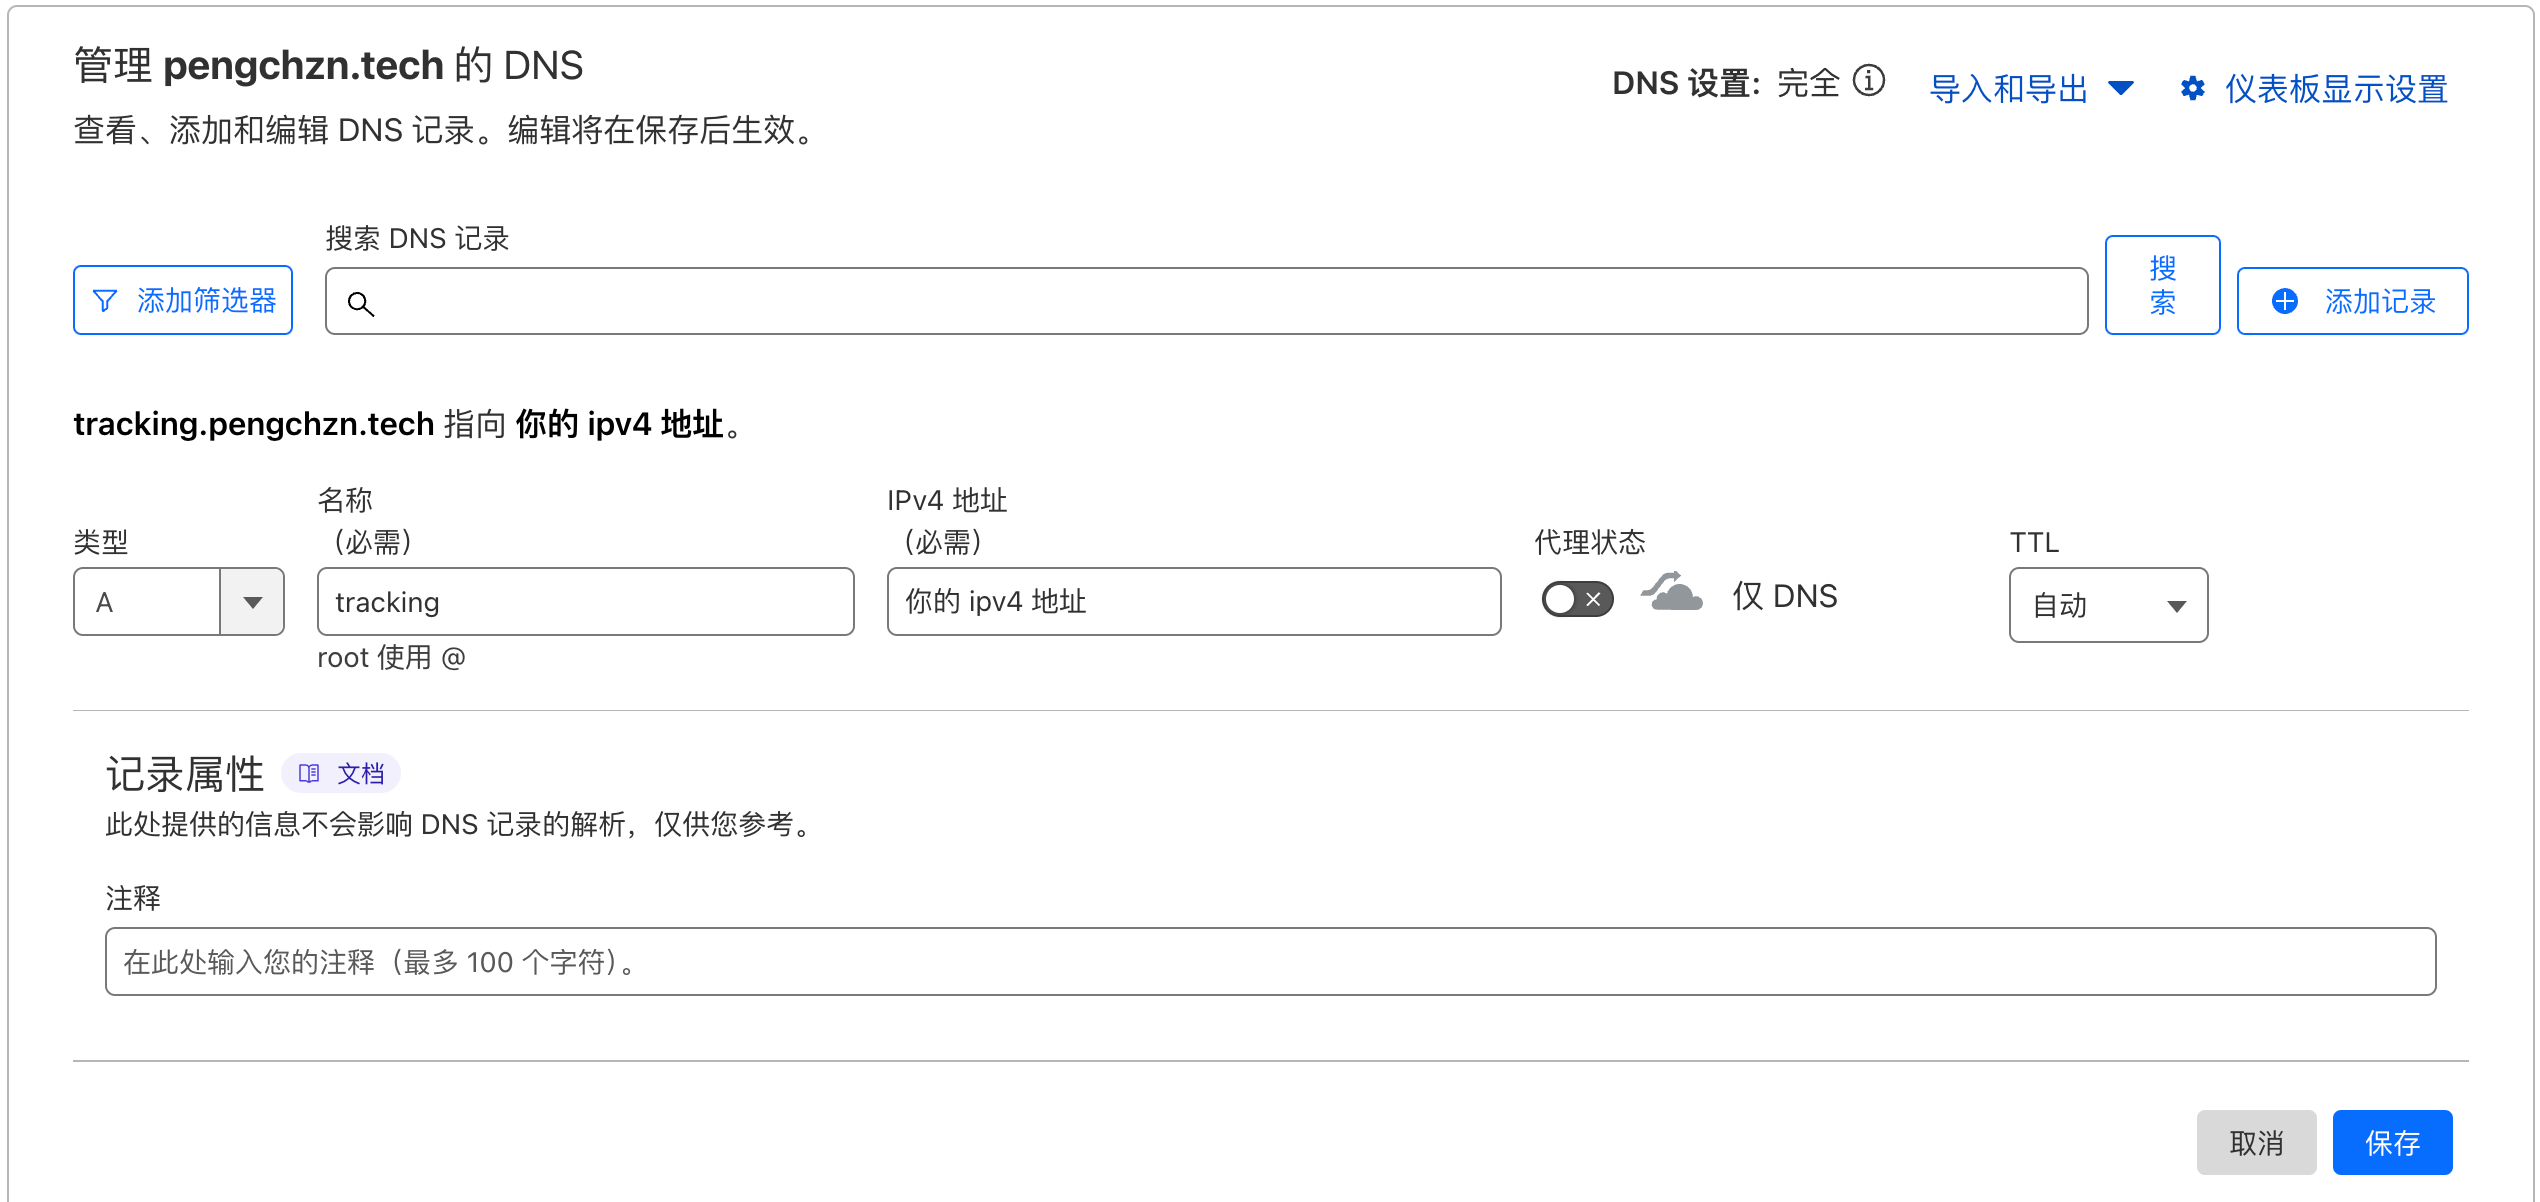
Add an A record to your domain, pointing to your IPv4 address.
- Host/Name: Your desired subdomain (e.g.,
tracking). - Value: Your VPS’s IPv4 address.
- TTL: The default value or a lower value (e.g., 300 seconds) for faster updates.
- Proxy Status: When using Cloudflare:
- Set to “DNS only” (recommended for most setups).
- Alternatively, if keeping proxy enabled, set the SSL/TLS encryption mode to “Full” or “Full (Strict)” under SSL/TLS settings in your Cloudflare dashboard.
1.2 Docker Installation
# Download and run the official Docker installation script
curl -fsSL https://get.docker.com -o get-docker.sh
sudo sh get-docker.sh

# Start the Docker service
sudo systemctl start docker
sudo systemctl enable docker
1.3 Rybbit Deployment
First, clone the repository from Github.
git clone https://github.com/rybbit-io/rybbit.git
cd rybbit
Next, install and deploy. Before installation, make all scripts executable.
chmod +x *.shDeploy Rybbit by running the setup script.
./setup.sh your.domain.nameThis creates a .env file, then builds and starts the container. This might take a few minutes on the first run. Once the service is running and your domain DNS is set up, Caddy (the web server) will automatically obtain an SSL certificate for your domain. Go to https://your.domain.name/signup to continue setting up Rybbit.
If you want to use your own web server (like Nginx or one provided by your control panel), skip the Caddy container deployment using this command:
./setup.sh tracking.yourdomain.name --no-webserver --backend-port 8080 --client-port 8081This does the following:
- Does not start the Caddy container.
- Exposes the backend service on host port 8080.
- Exposes the client service on host port 8081.
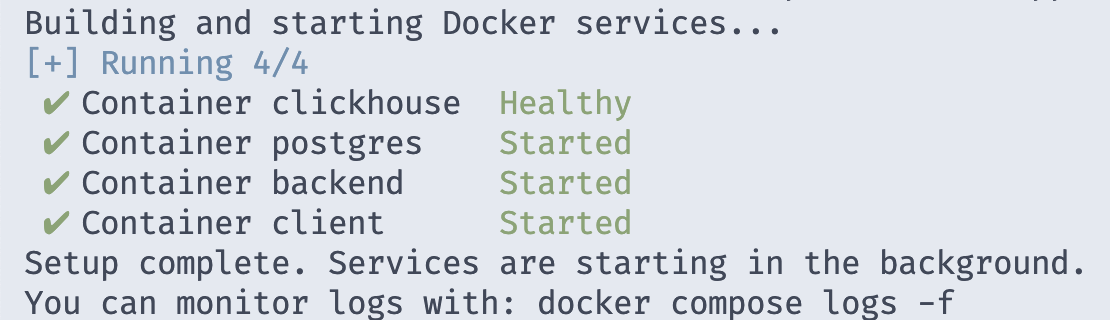
When you see the following message, your service is successfully deployed!
2. Rybbit Configuration
If everything is working correctly, you’ll see the login screen. If you’re using your own web server, as of June 2nd, 2025, you might find that clicking login/register does nothing. The console will likely show 401/404/502 errors.
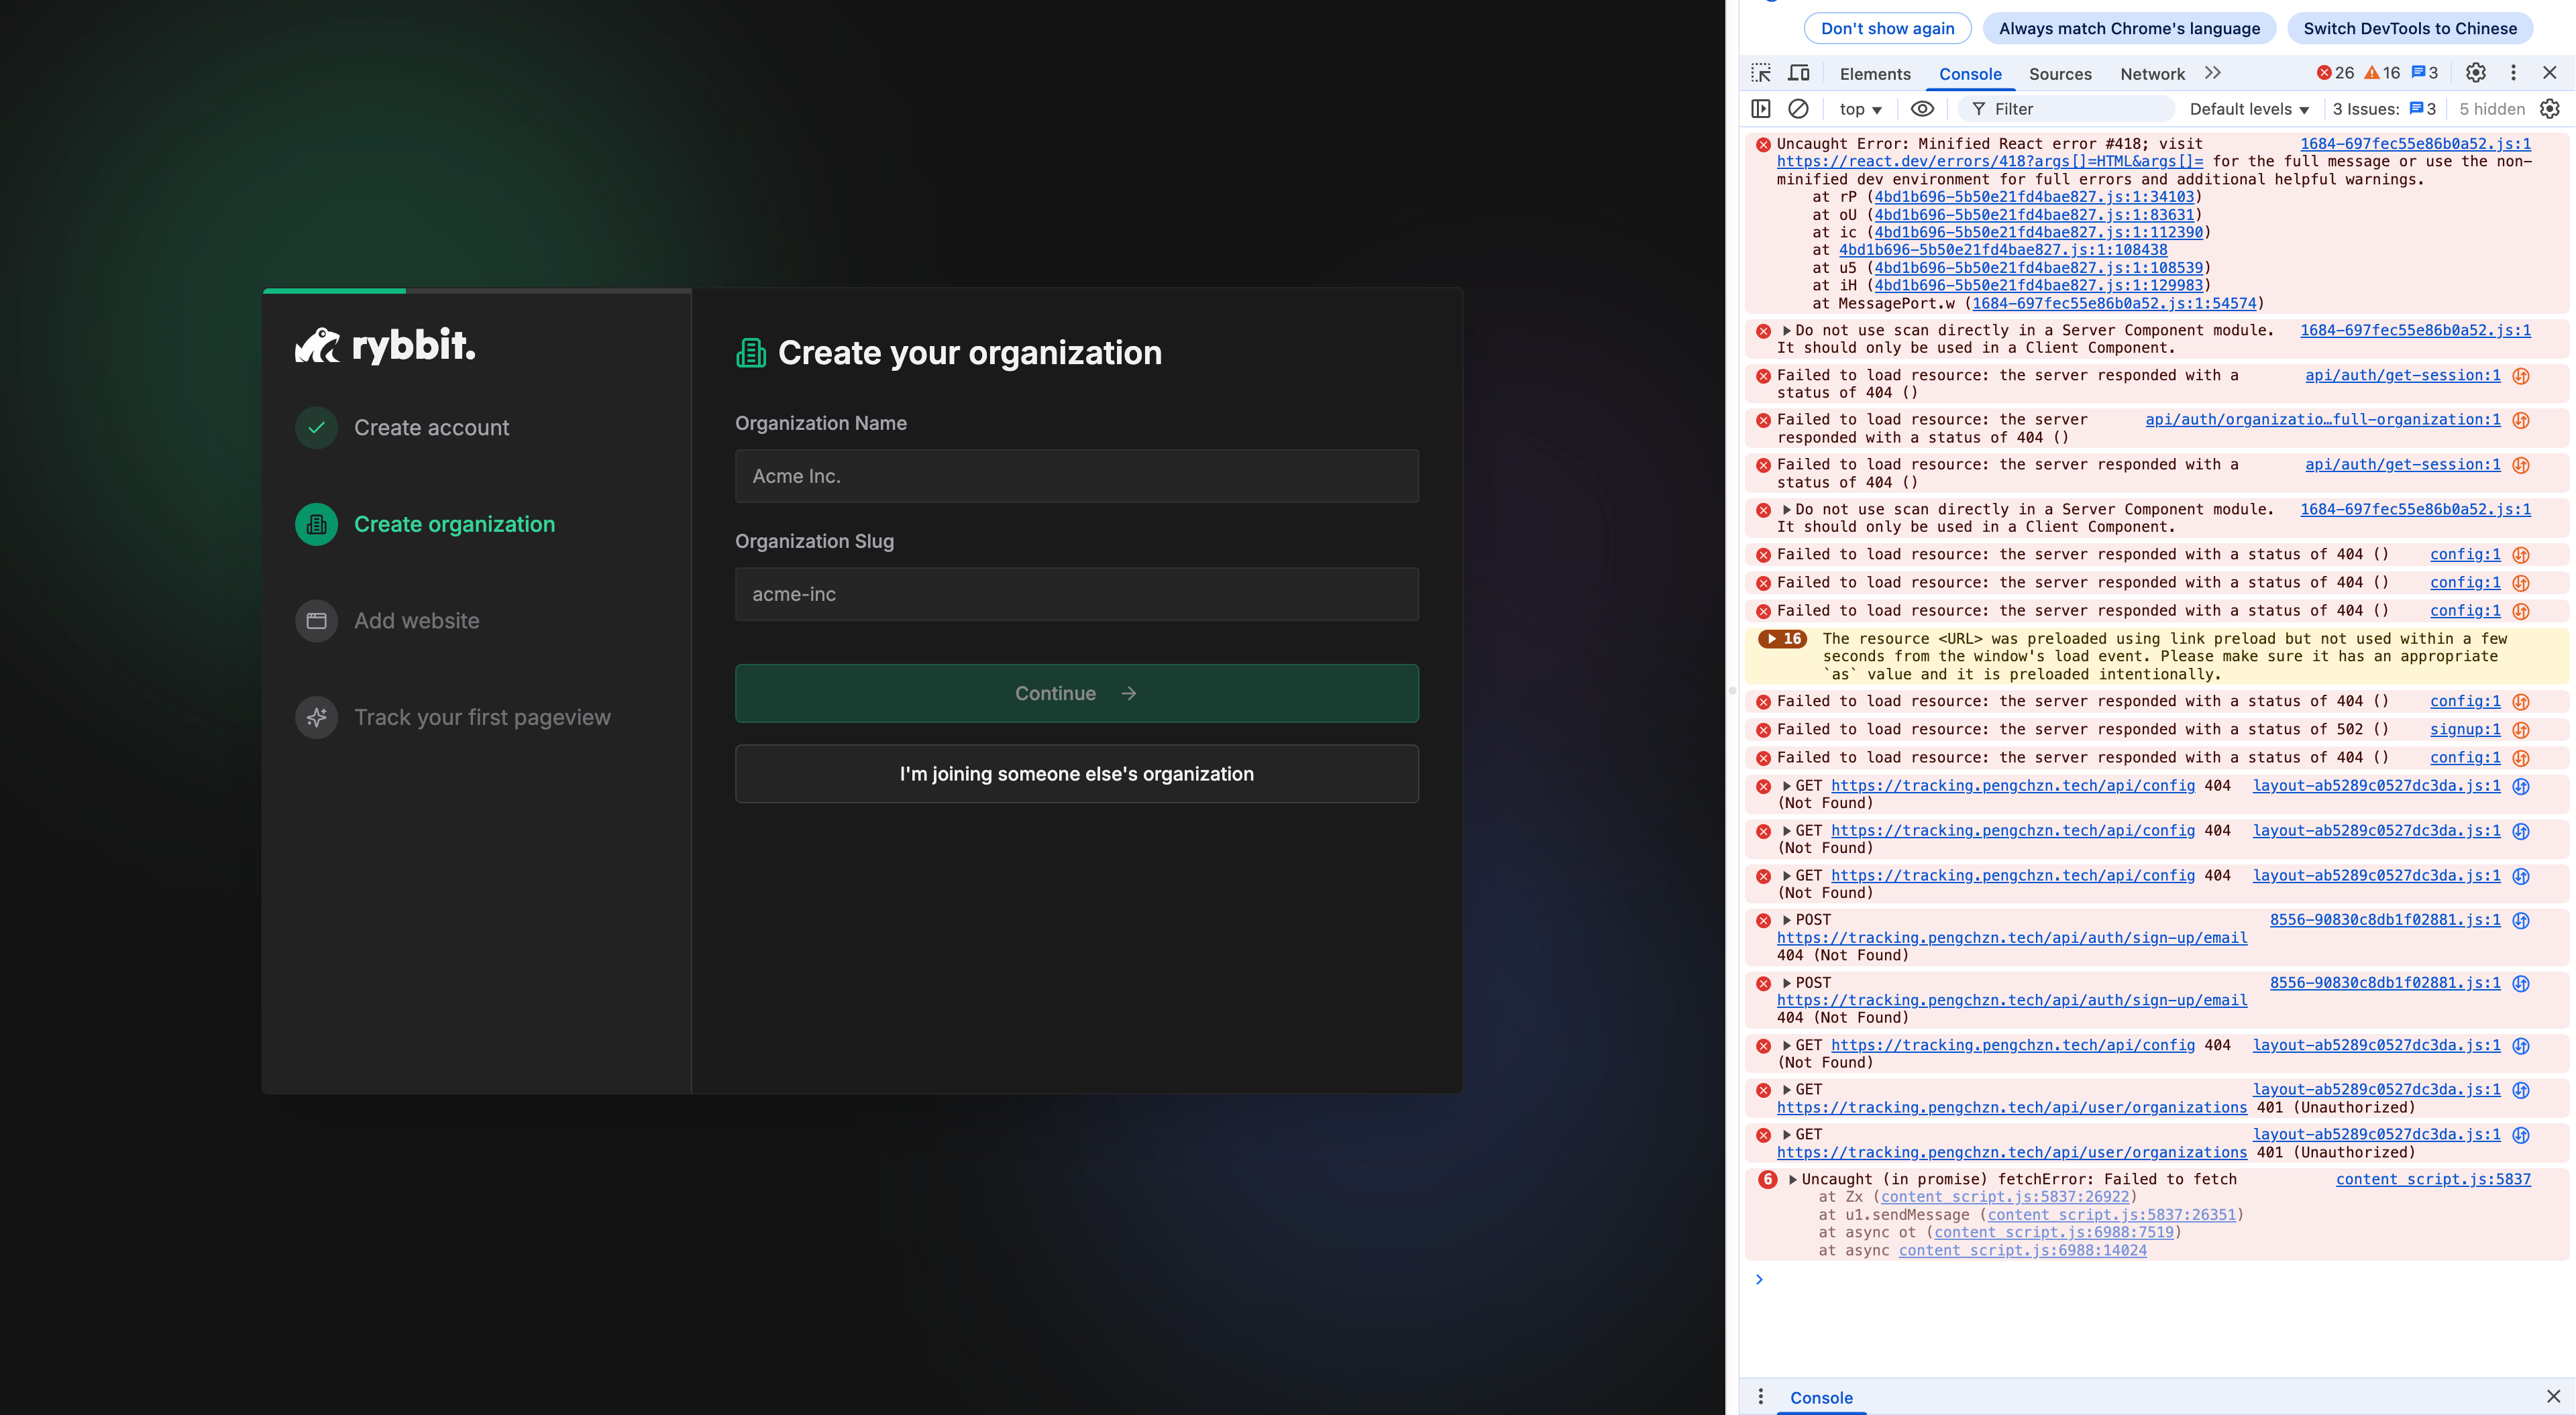
Try modifying your Nginx or other web server settings (I use 1panel) by adding the following configuration code to restore normal functionality.
location /api/ {
    proxy_pass http://localhost:3001;  # No trailing slash, no rewrite
    proxy_set_header Host $host;
    proxy_set_header X-Real-IP $remote_addr;
    proxy_set_header X-Forwarded-For $proxy_add_x_forwarded_for;
    proxy_set_header X-Forwarded-Proto $scheme;
}
After registration and website configuration, Rybbit provides code to insert into your webpage. Here’s an example for my WordPress Argon theme. Open functions.php, paste the code below, and save.
function add_rybbit() {
  ?>
  <script
    src="https://tracking.pengchzn.tech/api/script.js"
    data-site-id="1"
    async
></script>
  <?php
}
add_action("wp_head", "add_rybbit");